Creating custom brushes in Photoshop is easy and allows you to add dynamic effects to your artwork. We explain how in our Adobe Photoshop training courses.
Firstly source some calligraphic brush stroke image on the internet, and copy it to your Desktop. Then reduce the colours to pure black and white (if necessary) through the Image > Adjustments > Hue/Saturation panel. Now create a wide selection around the brush stroke with the Rectangular Marquee tool. Go to the Edit menu and choose Define Brush Preset > OK.
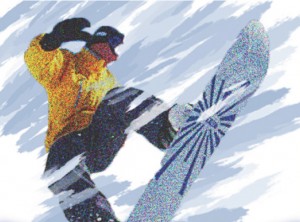
Next open a photographic image, in this case the Snow-boarder. Create a new blank layer on top.
Go to the Brush panel and in the Brush Tip Shape section enter an angle of 45 degrees, a Roundness of 85 and Spacing 60. In the Shape dynamics section change the Size Jitter to 100. Also tick Flip X and Flip Y Jitter at the bottom to add some variation to the brush strokes. Next go to Scattering and tick Both Axes and change the Scatter value to 80. In the section named Transfer or Other Dynamics change the Opacity Jitter to 100. This affects the density as you paint.
Make sure that the Brush tool is selected and open the Brush Picker. Select your new brush just created which will be the last in the list, choose a colour. Use the brush tool to apply strokes to the blank layer at the top of the layer stack. Adjust the brush size via the square brackets keys ({ and ]) beside the letter P on your keyboard, and also adjust the opacity of the layer later if necessary. Never paint directly onto the image since this hard to undo later – it’s much better to apply such effects to separate layer on top, which can be easily discarded if desired.
Many more tips and techniques can be found at the Adobe website. And see many examples of our clients’ work on our Facebook page.
Other related Photoshop Blog Posts:
Photoshop custom brushes
Aug25

 Graphic Design Courses