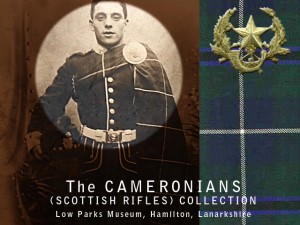
Many of our clients use Photoshop to create web banners like the one illustrated here. This is one of the many processes we demonstrate in our Adobe Photoshop training courses.
This banner was put together for the local history section of a public library. The first step is always to create a blank canvas since you don’t want to risk making changes to your original image. We chose the common banner size of 640×480 pixels. We then copy our main photograph into the banner canvas, resizing the image as we do so. The original may need some tonal and colour adjustments, as well as some sharpening using the Unsharp Mask filter.
Some retouching may also be necessary for damaged images like this one. In this case we used the Spot Healing Brush and the Patch tool.
Next we wanted to highlight the figure so, after sampling a colour from the image with the Eyedropper tool, we created a feathered elliptical selection and filled the inverse with the sampled colour.
We then copied across the regimental tartan image, and the regimental badge. Tonal and colour adjustments were also made to these layers.
Some text was added using the type tool – this can be copied and pasted from the client’s website. Tweaks to the font size, leading and tracking was done via the Character and Paragraph panels.
And finally we used the Save for Web feature to save a copy of the image for uploading to the client’s website. The original layered file is saved as a PSD (Photoshop Default) for future editing.
Many more tips and techniques can be found at the Adobe website. And see many examples of our clients’ work on our Facebook page.
Other related Photoshop Blog Posts:
Photoshop web banner tutorial
Jun15

 Graphic Design Courses