by Design Workshop Sydney
Jan12
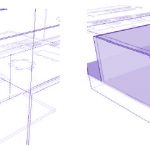
The next step after creating walls in a 3d architectural model is to cut holes for doors and windows. We demonstrate the process in our SketchUp courses. First make sure that the the Floorplan layer is visible – this will show us the locations for our doors and windows. However, these locations are hard to see when working in a... Read more...
by Design Workshop Sydney
Jan12
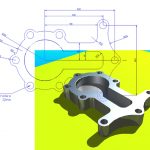
The transition from 2d to 3d in Autocad is simple and easy. We show you how in our Autocad 3d courses. In this quick tour of the 3d modeling process we will create a bracket shown here using the 2d drafting tools, the 3d extrude and subtract tools, then utilize the materials, lighting and rendering functions. The basic outlines of... Read more...

by Design Workshop Sydney
Jan12
There are many options available for customizing the Autocad 2d interface. We show you how in our Autocad 2d courses. Firstly to open the Options dialog box there are three methods. You can type OP into the Command line at the bottom of the screen and hit Enter. Or, it may be opened via the top left Application button. The... Read more...

by Design Workshop Sydney
Jan3
Adding text in Photoshop is easy and straight-forward. We explore all the ins and outs in our Adobe Photoshop courses. First select the Type tool from your toolbox on the left of the Photoshop interface (shown here in zoomed in). Then click somewhere on your image; a flashing cursor will appear as well as a new blank layer in your... Read more...
by Design Workshop Sydney
Jan3
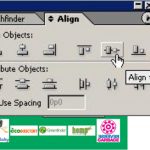
After importing several images or logos into an Indesign layout you may wish to align and distribute them evenly across a page, as in the example shown here. We demonstrate how in our Adobe Indesign courses. First of all, make sure that the first and last items are in their correct positions, probably aligned to the closest margins. Then select... Read more...

by Design Workshop Sydney
Jan3
Artwork is often tidied up in Illustrator by creating a clipping path around the artwork. We show you how perform this easy procedure in our Adobe Illustrator courses. As you can see in our finished artwork shown here, the image of the frog and the flight path of the ladybird would extend to the edge of the page. We may... Read more...
by Design Workshop Sydney
Dec28
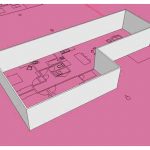
There are several methods of creating exterior walls in SketchUp. We explore them all in our SketchUp courses. If you have SketchUp Pro go to File > Import > browse to where you keep your Plans > Type: DWG > select the file. Then hit the Options button > check Geometry > Units: millimeters (that is, the same units as... Read more...
by Design Workshop Sydney
Dec28
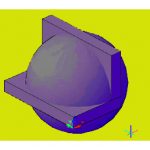
The Intersect command is one the the three Boolean operations mentioned in a previous blog post, and is one of the many methods of 3d modeling which we explore in our Autocad 3d courses. For example, to create the bracket on the top right, first create two boxes as in the far left image. Go to the Visual Styles panel... Read more...

by Design Workshop Sydney
Dec26
Setting your units of measurement is one of the first things to do when setting up a new drawing in Autocad. We show you how in our Autocad 2D courses. Before starting drawing in a new document you should always set your units for lines, objects and angles. This may also be set up in your working template so you... Read more...

by Design Workshop Sydney
Dec21
Making colour adjustments to an image in Photoshop is a simple process – we show you how in our Adobe Photoshop courses. The first part of the process is to make a selection – in this example we have chosen the Elliptical Marquee tool and set the Feather value to 2 or 3 pixels on the top Control panel, which... Read more...

 Graphic Design Courses